In the jagged basalt-lined valley of Paradise Forks, there’s an orange tower that has split off the wall, leaning at just an angle to create the ultimate training climb. At the bottom, the space between the wall and the block is only a sliver to squeeze fingers into, but over 70 feet it gradually widens to a gaping maw that fits a whole body. Learning to fit hands, elbows, shoes, and knees into the crack is just the beginning; figuring out how to shimmy up the thing requires a whole vocabulary of techniques. So here, for your educational delight: a crack-climbing dictionary of how to fit your pieces into the puzzle. (And here, a programming note: I’ve come to the conclusion that it’s impossible to write about crack climbing in a way that’s not rife with double entendre. Feel free to giggle at your own pace.)
Just the Tips:

Tips
A crack that’s the width of a Sharpie marker is called a tips crack because you can only get the first pad or maybe knuckle (if you’re lucky) of your fingers in. The placement is very basic: stack your fingertips in a line and squeeze them as far into the crack as you can. It’s not going to be a good hold, but you can make it a little better by twisting your hand to “cam” your fingers in the crack. Try it with your thumb pointing up and again with your hand turned around, thumb pointing down – the downward placement is generally more secure but harder on your wrist.

Tips with thumb
Fingers:
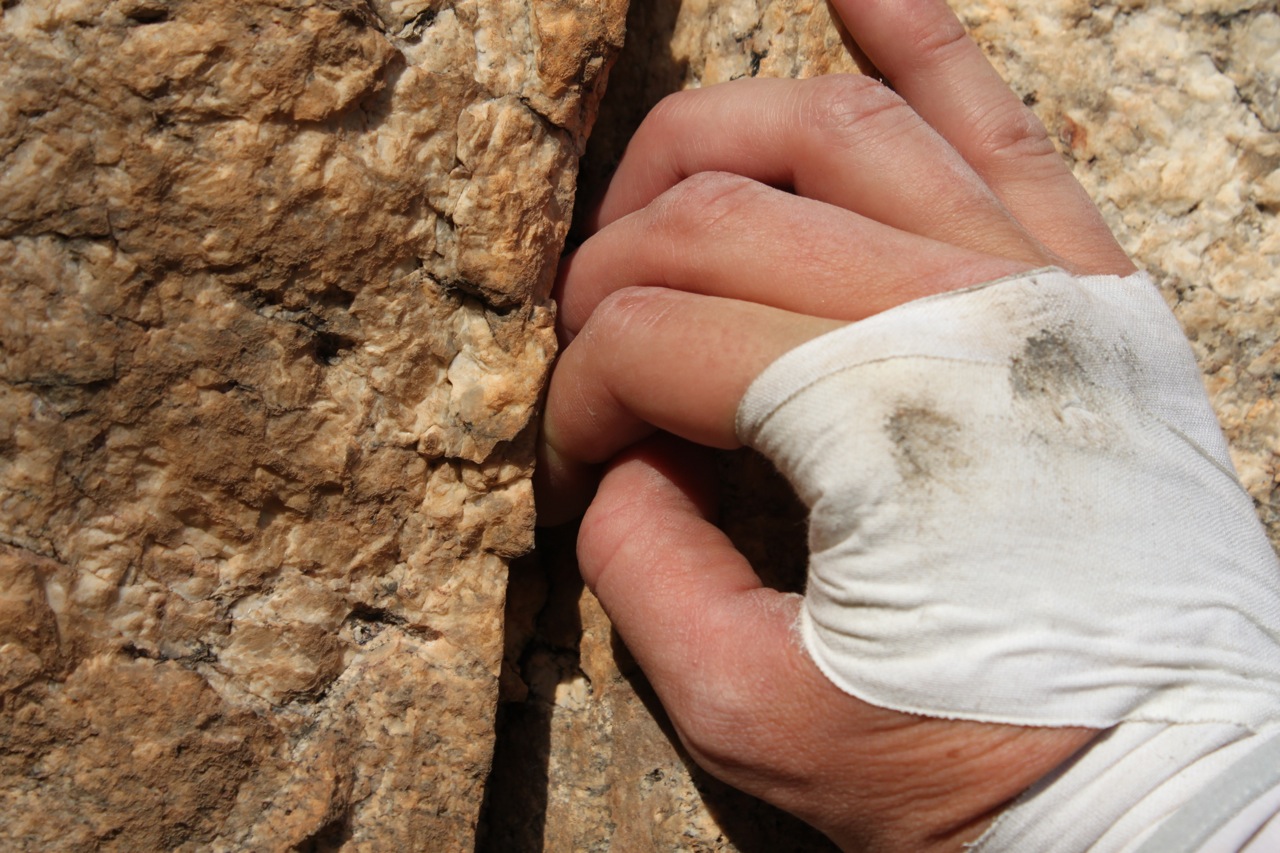
Finger cracks work on the same mechanics as tips cracks, but you’ll get the whole length of the fingers and second knuckles in the crack. Keep in mind that your middle finger has the biggest knuckle, and if you can find a little constriction to wedge that knuckle in, like placing a wall nut, it’ll be even more secure.

Ring lock
Slightly wider than that, you’re in the realm of ring locks. Start by turning your hand to point thumb down, and place the pad of your thumb against one side of the crack. Then stack your index finger on top of the thumbnail and wedge as many fingers as possible on top of that. Your fingers putting downward pressure on your thumb is what holds this one in place.
So much of the success of these thinner cracks is about looking carefully for the variations in the crack to take advantage of. Working the feet on these sizes can be miserable, because not much (if any) of the tip of your shoe will fit in. But work your feet the same way you work your hands: start with your foot angled more vertically to toe the nib of your shoe in the crack, and once in twist your foot back toward a horizontal step. Sometimes one side of the crack sticks out more than another, and you can toe against it like a layback; look for any little inconsistencies that you can turn into footholds.
Hands:

Hand jam
“Thin hands” is a crack that fits the whole length of fingers and all the knuckles, but not the meat of the thumb. I don’t have a lot of great advice for these except to move fast and try to overlap your fingers to expand your hand in the space. Hand jams, however – where the whole thumb and palm are included – those tend to be awesome. Cup your hand slightly, placing your finger pads on one wall of the crack and your knuckles against the other. Drop your thumb down to the middle of your palm to puff up the joint. More of your shoe will fit in cracks this wide, so try slipping your toe in with the sole of the shoe almost parallel to one side of the crack, then twist to tighten the rubber in the crack.

Double hands
When a single hand is too loose, try stacking your hands, back to back, with finger pads pressing against the wall. To make this jam successful, the hand that’s on top needs downward pressure, so pull that elbow down and in to your side. The biggest trick: now your hands are tied up, and you’ll have to find good feet to move upward.
Fists:
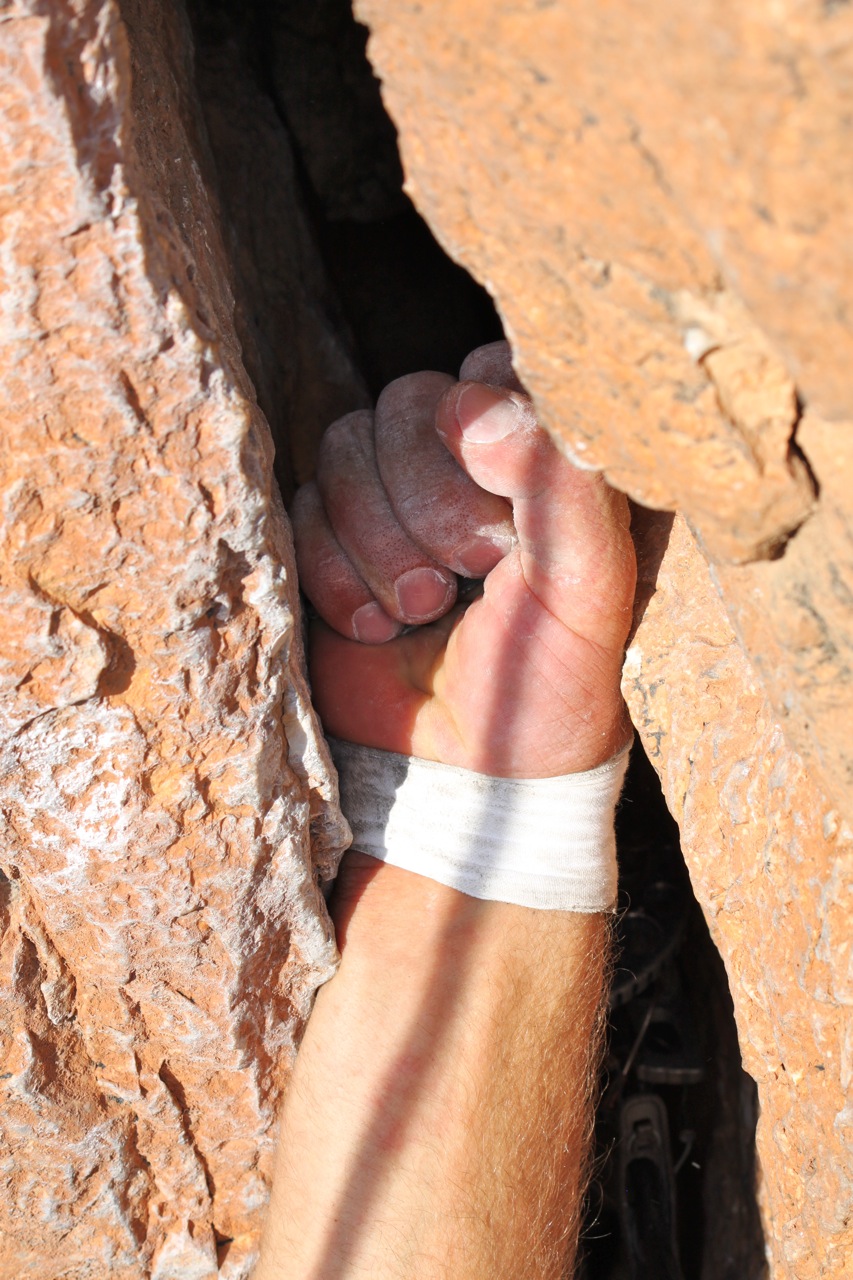
Slide your hand horizontally in the crack, then curl your fingers into a fist. The curling action will widen your hand, hopefully enough to stick. Try with your palm facing down (into the crack) and up (out from the crack). Here again, if you can find a slight constriction to hold your knuckles, this jam will be bombproof. At this size you’ll likely get the whole front of your shoe solid in the crack. Angle your pinkie edge down first and step down with your big toe.

Fist jam
As the crack widens, you can try some two-handed variations, like crossing your wrists and keeping one palm flat against the crack while curling the other into a fist; or for even bigger placements you might be able to stack two fists, wrists crossed (and remember that the hand crossed on top is the one that needs the downward pull). On these bigger sizes, the footwork gets stranger. You may be able to get your toe far in the back of the crack and edge your heel in, kicking your toe against the wall like Charlie Chaplain.
Elbow Grease:
The only silver lining to dancing the Chicken Dance at weddings is that it gives a little primer on a crack technique: flap a chicken wing and stick it in the crack, with your shoulder and hand pressing at the outside edge. Stick a knee into the crack and shuffle up by wedging your knee up and flapping the wing. If your whole arm fits, press your palm against one side and your shoulder against the opposite wall – this is called an arm bar.
At this size and wider, this is where the groveling begins. Different bodies have different strengths, so get creative. Keep your focus on putting outward and downward pressure against the walls of the crack; that’s the only way you’ll shuffle up. If you’re only focused on fitting in the crack, you’ll easily get stuck there.
Do you love crack climbing? Have you come up with inventive techniques of your own? Share them in the comments!